HiPS (Hierarchical Progressive Surveys)#
Warning
The hips functionality in the reproject package is currently experimental, so use with care and please report issues at astropy/reproject
HiPS (Hierarchical Progressive Surveys) is a standard that can be used to representing astronomical images by a series of tiles at different resolutions. It is used for example by Aladin.
The reproject.hips sub-package includes helper functions for constructing
HiPS datasets from a variety of inputs. The main function is
reproject_to_hips(), which takes in data in a variety of
formats and types (see reproject_to_hips()), for example
FITS files, HDU objects, PNG/JPEG images with AVM metadata, and so on.
Unlike the other reprojection functions, the output is not a file but a
directory, which contains all the tiles, as well as metadata and an
index.html file which can be used to view the dataset.
Getting started#
We can use this with an example dataset which is a 2MASS K-band image towards the center of our Galaxy:
>>> from astropy.io import fits
>>> from astropy.utils.data import get_pkg_data_filename
>>> hdu = fits.open(get_pkg_data_filename('galactic_center/gc_2mass_k.fits'))[0]
The simplest way to call reproject_to_hips() is
>>> from reproject import reproject_interp
>>> from reproject.hips import reproject_to_hips
>>> reproject_to_hips(hdu,
...                   output_directory='gc_2mass_k',
...                   coord_system_out='equatorial',
...                   reproject_function=reproject_interp)
The arguments passed to reproject_to_hips above are all required:
The first argument is the data to reproject (see
reproject_to_hips()for a list of supported data types)The
output_directoryargument is the output directory that will be created. To avoid any confusion, if the directory already exists, an error will be raised.The
coord_system_outargument, which can be'equatorial','galactic', or'ecliptic', and indicates the coordinate system in which the HiPS dataset will be defined.The
reproject_functionargument, which can be given any of the core reprojection functions includingreproject_interp(),reproject_exact(), orreproject_adaptive().
Once this function has run, you can check the result by setting up a local web server and then viewing the result in a browser.
The easiest way to do this is to go into the generated HiPS directory and start a web server using Python, e.g.:
cd gc_2mass_k
python -m http.server
This will output something like:
Serving HTTP on 0.0.0.0 port 8000 (http://0.0.0.0:8000/) …
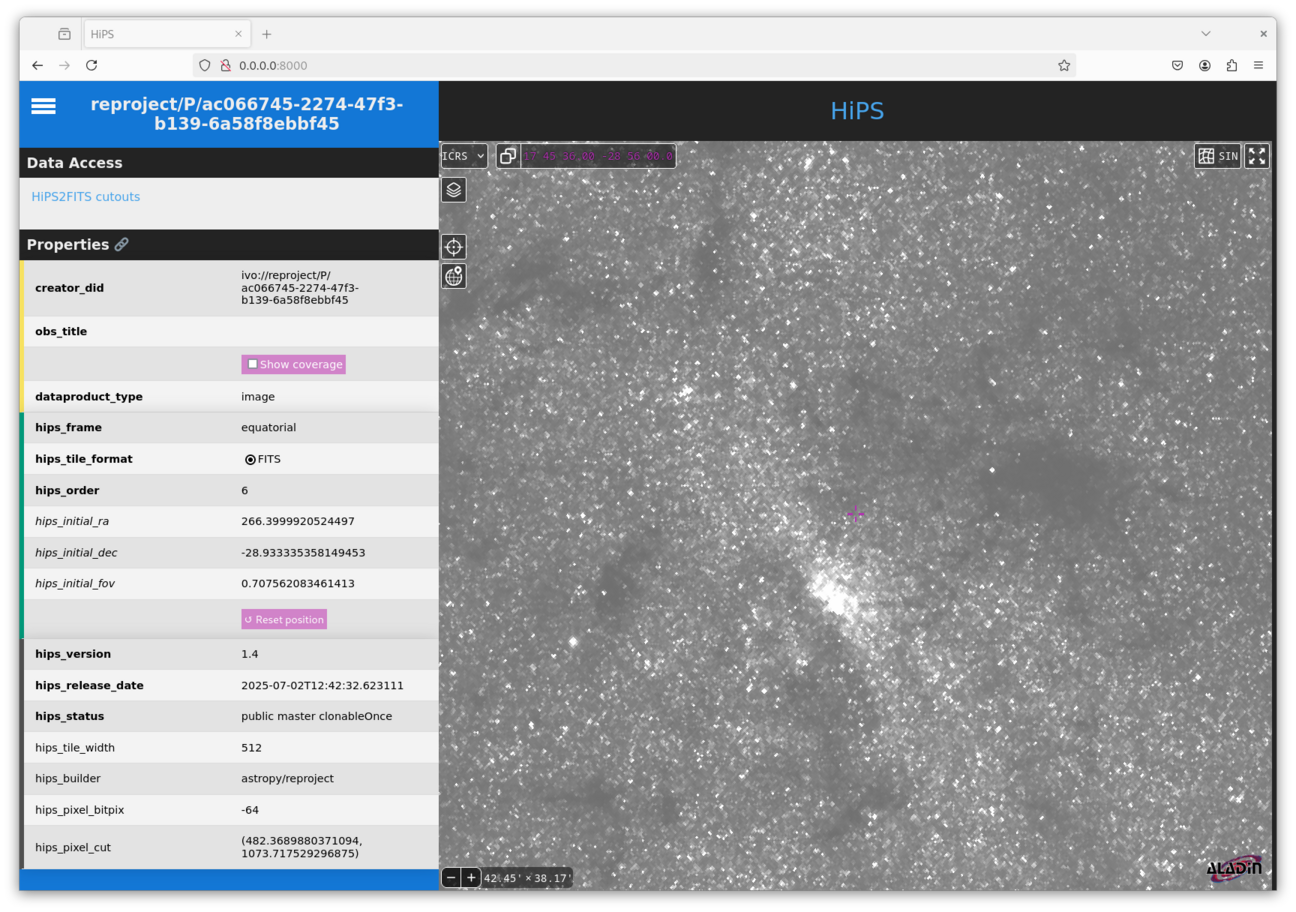
Go to http://0.0.0.0:8000/ in any browser window, and you should then see
something like:
Available options#
Setting the maximum order#
The default behavior of reproject_to_hips() is to automatically pick a sensible
maximum order/depth for the HiPS dataset based on the input data resolution, but it is also possible
to set this explicitly:
>>> hdu = fits.open(get_pkg_data_filename('galactic_center/gc_2mass_k.fits'))[0]
>>> reproject_to_hips(hdu,
...                   output_directory='gc_2mass_k_level',
...                   coord_system_out='equatorial',
...                   reproject_function=reproject_interp,
...                   level=3)
Setting/overriding properties#
A HiPS dataset contains a properties file which describes the HiPS dataset.
Some of the parameters are set by reproject_to_hips()
by default. Of these, some cannot be overridden (such as tile size and format),
but others can be overridden or set if they were not present in the first place.
A list of all properties can be found in the HiPS 1.0 standard.
You can set/override properties by passing a dictionary to the properties
parameter:
>>> hdu = fits.open(get_pkg_data_filename('galactic_center/gc_2mass_k.fits'))[0]
>>> reproject_to_hips(hdu,
...                   output_directory='gc_2mass_k_custom_properties',
...                   coord_system_out='equatorial',
...                   reproject_function=reproject_interp,
...                   properties={'obs_title': 'My favorite dataset',
...                               'hips_pixel_cut': '400 1000',
...                               'creator_did': 'ivo://centre/P/favorite-dataset'})
Progress bar#
Depending on the size of the input image and the maximum order/depth of the HiPS data
to be generated, the process of reprojection can in some cases be slow due to the
number of tiles to be generated. To track the progress, you can pass a callable
such as a function, to the progress_bar option. This callable should take an
iterable and yield each of them in time, and can draw/update the progress bar.
One option is to use the tqdm package:
>>> from tqdm import tqdm
>>> hdu = fits.open(get_pkg_data_filename('galactic_center/gc_2mass_k.fits'))[0]
>>> reproject_to_hips(hdu,
...                   output_directory='gc_2mass_k_custom_progress',
...                   coord_system_out='equatorial',
...                   reproject_function=reproject_interp,
...                   progress_bar=tqdm)
100%|█████████████████████████████████████████████| 6/6 [00:00<00:00,  6.13it/s]
Multi-threading#
By default, tiles are computed and written out in a single thread, but it is possible
to enable multi-threading, either by setting threads=True (which automatically
selects the number of threads), or e.g. threads=8 to set the number of threads
explicitly.
Generating HiPS3D datasets#
The reproject_to_hips() function can also be used to reproject
spectral cubes to spectral HiPS3D datasets. When use in this way, the following
arguments can be used to control the spectral axis:
tile_depth=: the depth of the tile in pixels, analogous totile_size=level_depth=: the order of the spectral tile indexing, analogous tolevel=for the spatial dimensions